- CPAP Masks
- CPAP Machines
- CPAP Supplies
- CPAP Accessories Home Sleep Test
- Blog
Questions? 1-800-356-5221
Chat with a 5-star expert now!
Questions? 1-800-356-5221
Chat with a 5-star expert now!
- Home /
- CPAP Supplies /
- Power Solutions /
- Power Cords /
- Philips Respironics
(1) Read Review
Sorry, this item is no longer available.
Get Your Sleep Back
Setup is easy & takes minutes
Orders ship within hours (M-F)
Resupply items set to autopilot
Item # 1028870
Not currently in stock

Click image to expand
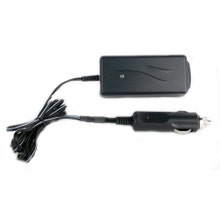
Battery Charger for Respironics Battery
This is a replacement AC-to-DC battery charger for the Respironics Battery Pack.
Battery Charger for Respironics Battery
This is a replacement AC-to-DC battery charger for the Respironics Battery Pack.
Learn More About This Product
Charging the Battery
The battery must be in an upright position during use and while charging. Please remove the charger from the carrying case before charging.
Replacing the Charger Fuse
If the battery fails to charge, check the fuse, located in the auto adapter. If the fuse has blown, replace it using instructions below. If the problem continues, contact CPAP.com for help.
The battery must be in an upright position during use and while charging. Please remove the charger from the carrying case before charging.
- Connect the Auto adapter end of the charger into the battery pack socket, located in the front pouch of the carrying case.
- Plug the power cord into the charger.
- Monitor the LED on the charger While plugging the power cord into the wall outlet and ensure that it turns RED (the charger LED may turn RED for only a short time before turning ORANGE). If the charger LED is RED for any length of time, the charger is correctly connected to the battery. If the charger LED does not turn RED for any length of time, leave the power cord disconnected from the wall for 3 minutes and repeat this step. If the charger does not turn RED, ensure the auto adapter is fully seated in the battery pack socket and that the battery and charger fuses are not blown. If the charger LED still does not turn RED, contact CPAP.com for help. During normal operation, the battery charger's LED will appear RED while it is charging. When the battery is 80-95% charged, the LED will appear ORANGE. When the charger if fully charged, the LED will turn GREEN.
- After the LED turns GREEN, the charger can be disconnected from the battery.
Replacing the Charger Fuse
If the battery fails to charge, check the fuse, located in the auto adapter. If the fuse has blown, replace it using instructions below. If the problem continues, contact CPAP.com for help.
- Open the fuse holder by turning the retaining nut counter-clockwise on the auto adapter.
- Remove the tip of the fuse holder.
- Replace the fuse with a 3 Amp fuse, being careful not to dislodge the spring inside the fuse holder.
- Replace the tip of the fuse holder and retaining nut. Turn the retaining nut clockwise until the connection is tight.
CPAP.com 100% Price Protection Guarantee
When you shop with us, we want you to be confident that you are receiving the best available price. If this items goes on sale or you spot an online or retail competitor with a lower price within seven days of your purchase, let us know, and we will credit you the difference.
"Super helpful, fast shipping, friendly assistance, great selection, I love this company."
- Verified Customer, 10/25/22
★★★★★
(1)
Read Reviews
Need a personal touch?
Chat with CPAP
Questions about a product or an existing order? Start a chat and let us help you out.
Start a chat

Customer Reviews
See what other customers are saying.
Overall Rating
★★★★★
5.0 1 Review 5 Stars
1
4 Stars
0
3 Stars
0
2 Stars
0
1 Stars
0
Sort By
★★★★★
Perfect
Verified purchase | Aug. 17, 2015 | Verified CPAP.com Customer
Device worked as promised.
Was this helpful?
(0)
(0)